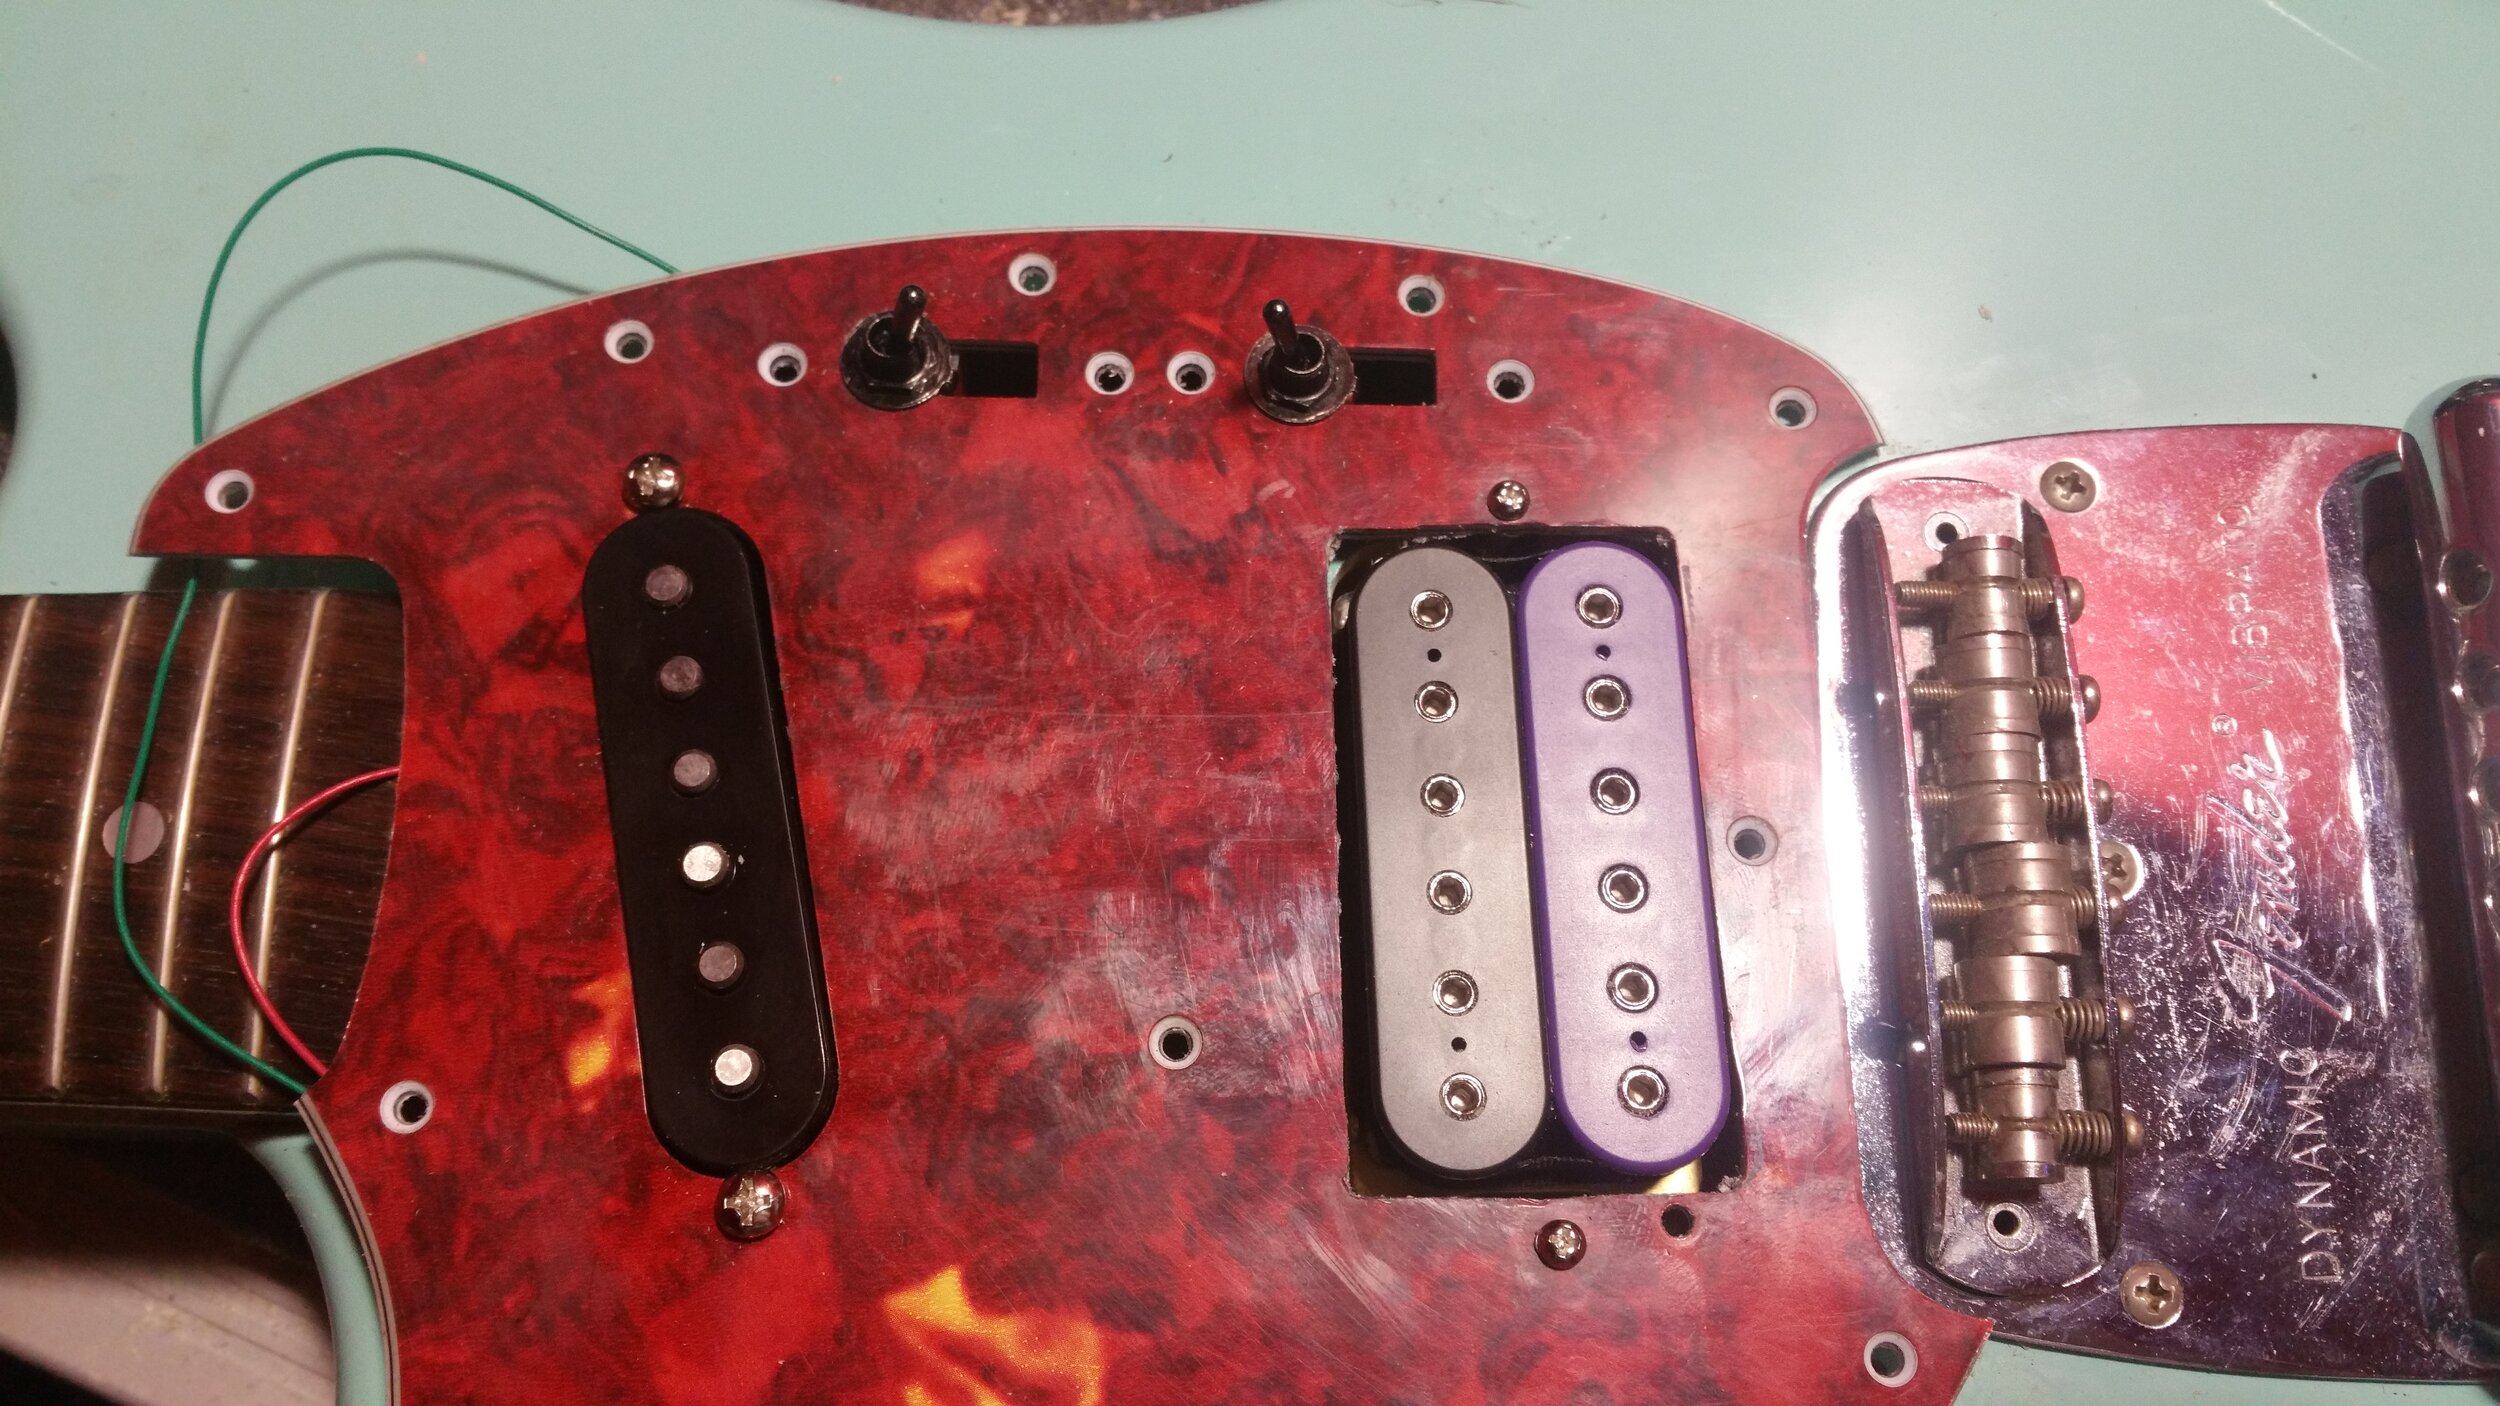
So couple years ago I had a friend bring this guitar into me for a humbucker install in the bridge and a new neck pickup. He wanted to change the wiring around while maintaining the original pick guard. Check out to see what we came up with. Not going to lie, the humbucker route was not perfect, but it was darn close and this was done about eight years ago.
So I had a 2002 Paul Reed Smith Core Standard 22 come in that suffered a massive fall. From what I was told, it feel off a stage and the cable punctured into the side and split the the body and caused all types of havoc. I am going to walk you through how I did the repair and show the before and after.
As you can see, the top has damage but it goes so much deeper.
As you can see here, the entire side was cracked, multiple splits driven in all different directions.
After gluing, I sanded the surface, and removed the debris and created a shelf to be able to graft in new wood to the area.
The back had a chunk missing and I had to open the hole, graft in new wood and reshape.
Here I grafted new wood into the top, filling in the shelf I had to remove.
After hours of sanding and filling other dings on the top that resulted from the fall, I just stripped the top and started a new.
I started with this burst, and hide all the repair, I then touched up a couple areas like the upper right horn that needed just a little more color.
Besides the control cavity that was messed up prior to me receiving this, the back is starting to look more as it should and the final details of the burst are being done. The repair is solid, the guitar is 100% stage ready, and will be continuing to make music across the country once again.
Was doing a standard refret on a PRS SE a couple weeks ago, and everything was going just like planed and everything was great. I noticed as I cleaned my board before fretting, that there was a small fracture in the remaining wood behind the 22nd fret. I tested to see how fragile it was and it just kinda crumbled and chipped out. I enlarged the chip so I could actually work with the break. After creating a small channel I took a blank of rosewood and grafted a new chip in, worked it to shape and contoured the edges so it would blend in with the board. I cleaned the slot, polished up to 800 sand paper, and removed the scratches from the last repair tech.
I am a stringed instrument tech, but I found myself as a pelican tech when my one wheel on my 1510 decided to blow out and my rolling case into a loud, skid mark making machine. Bought some roller blade wheels of amazon, removed the old wheel casters, new bearings, wheels and pins and my 1510 is quiet, and glides all over the airport and venue floors.
When I first graduated from repair school and I started working at a box office music store, and after a few weeks there I started seeing complex repairs coming in since there was finally a tech that can do more in depth repairs in the store. This Martin came in, with a crack measuring almost 13 inches if my memory is correct, and the customer was devastated that it was the end of his guitar but he heard if any one could fix it, I would be his best bet. After some hide glue, clamps, and strategic finish work, we sent this martin home looking good as new and with a fresh setup, the customer was exatatic and was so happy with his guitar once again.
After the initial repair, I let the instrument be humidified and the thin line slightly blended in with the wood grain, and dulled the finish and was perfect.
On Warped Tour 2017, I was teching for CKY, and we had the original bassist come out to do one song at his home town show. He said his bass should be fine but havent really touched it in ten years. I pull the bass out to see this finger board and completely rusted out strings. As a fan of clean and working instruments I immediately got to work, had to scrap the board twice, buff the frets from 220 to 12,000 grit polish clothes and abrasives and two applications of F-One Oil and the board was still thirsty. After about a half hour, we went from a extremely dirty board to a beautiful shine of the frets and a nice clean polished board.
So after the head stock repair, I removed all the parts from the instrument, did a full buff, and a fret level, crown and polish. I polished the body up with 6k, and 8k polishing paper and a buffing wheel. The frets were level, crowned by hand with a triangle file and buffed up to 12k grit polishing paper. Set up with 10s and went out on the road with the band again.
A couple years ago, this Gibson came into the shop, while I did more work than just the head stock repair, this blog walks through the repair. I believe it is a 1991 Gibson Les Paul Studio. She came in dirty, broken and with horribly worn frets and some major intonation issues.
After the break, I glued the head stock, added some wenge splines, sanded, painted and lacquered the neck to a brilliant gloss finish.